Spam and fake form submissions is one of the most annoying problems in lead generation. It messes up your data, uses resources, and wastes time.
So, how do you ensure that the data submitted by users is valid and not fake?
One sure fire way of ensuring that is to add a layer of verification to your form submissions.
In this post, we’ll show you how to add phone number verification to Contact Forms 7, which is a popular and free plugin for creating contact forms on WordPress websites.
By adding phone number verification, you can make sure that the phone numbers people enter in your forms are real.
This is a great way to reduce spam and ensure that you’re collecting valid contact information from your users.
For the purpose of this tutorial, we’ll be using Contact Form 7 Email Verification Plugin by Xfinity Soft.
Contact Form 7 OTP Verification lets you integrate your contact forms with Twilio API.
This integration allows you to send OTP code via SMS to the phone number given in the form submission.
When the user enters the code sent via SMS, the form submission is verified and added to the database.
Here’s a step by step guide on how to achieve that.
Step 1: Setup Your Twilio Account
To verify phone number, the first thing you’ll need is a Twilio account.
Twilio allows software developers to programmatically make and receive phone calls, send and receive text messages, and perform other communication functions using its web service APIs. You can use Twilio with applications like WordPress and WooCommerce.
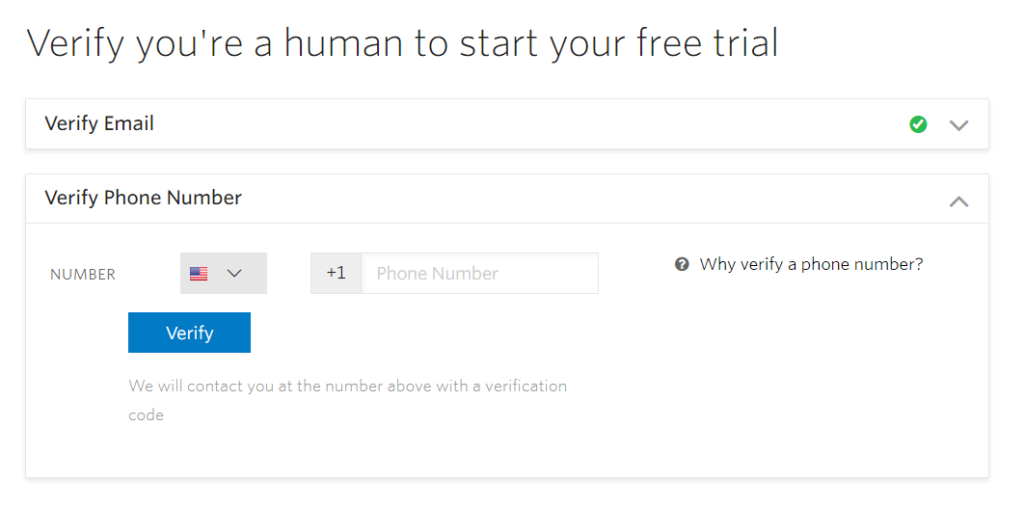
Go to the Twilio website and sign up for the free trial. On the Sign up page, you’ll be asked to enter your personal information. Then, you’ll need to verify your email address and your phone number.
After that, select the products you want to use. In this case, it’s ‘SMS’ and ‘Identity & verification’. Then, select the ‘With minimal code’ option and ‘PHP’ below that.
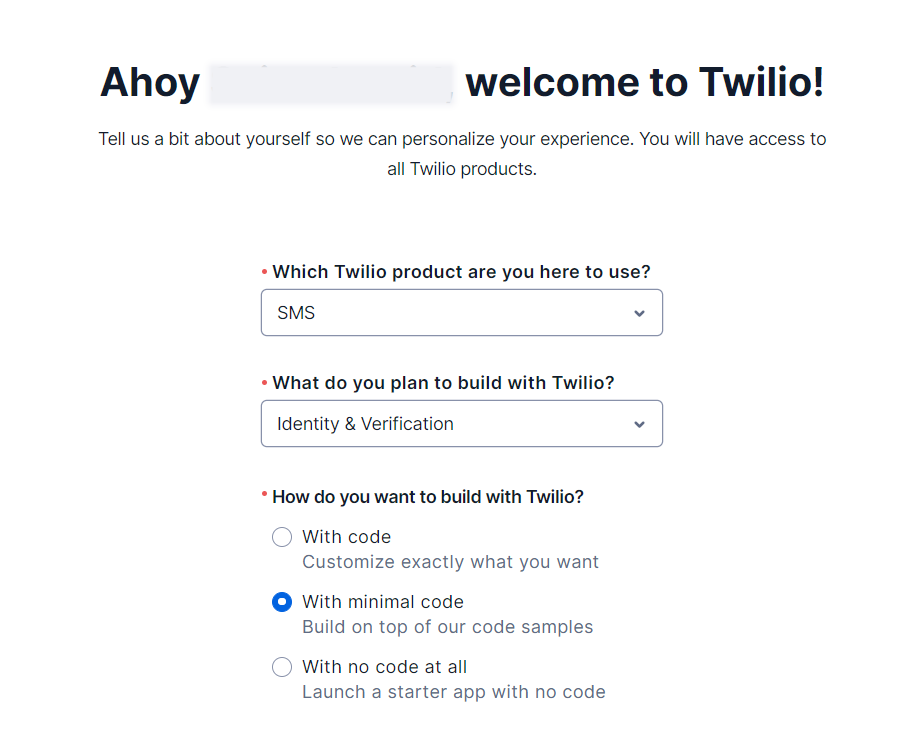
Once you enter your information, click ‘Get Started with Twilio’. After you sign up for an account, you’ll be taken to the Twilio dashboard. You need to click the ‘Get your first Twilio number’ button to get a phone number for your account. This will bring up a popup that contains your new number.
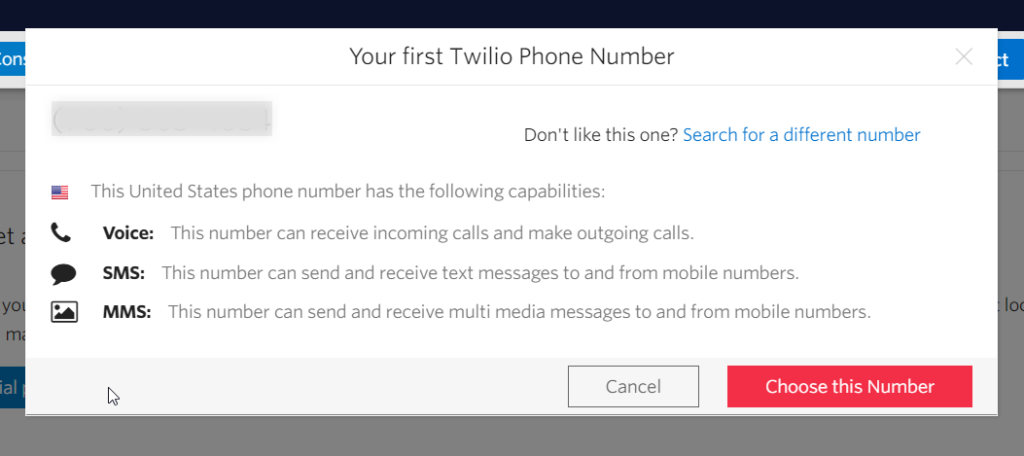
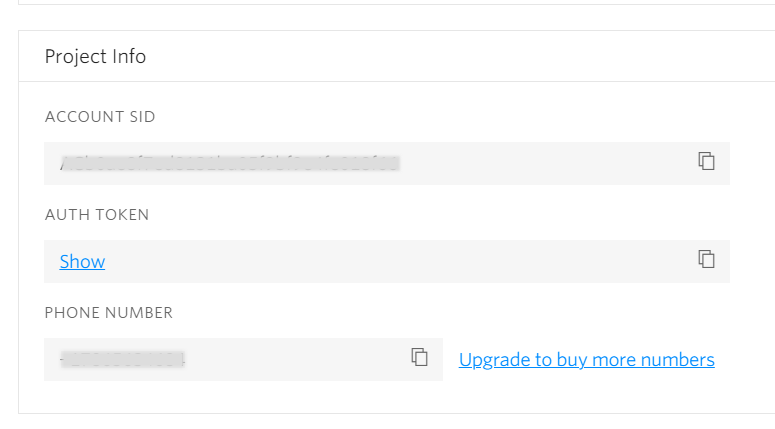
If you like the number, then click ‘Choose this Number’ to keep it. Your Account SID, Auth token, and new Twilio number are also listed on this screen. You’ll need this information later, so keep this tab open.
Step 2: Install and Activate Contact Form 7 Email and Phone Verification Plugin
To start adding phone number verification to your Contact Form 7, you’ll first need to install the Contact Form 7 Email and OTP Verification plugin.
This powerful extension integrates with services like Twilio, the default WordPress Email API, or SendGrid, allowing you to add a two-step verification process to your forms.
Here’s how you can install and activate this plugin:
- Purchase and Download: Head to CodeCanyon and get the Contact Form 7 Email and OTP Verification plugin by Xfinity Soft. Purchase and download the plugin.
- Upload to WordPress: Log in to your WordPress dashboard. Navigate to Plugins > Add New > Upload Plugin. Choose the downloaded file and click Install Now.
- Activate the Plugin: Once the installation is complete, click on Activate Plugin to enable its features on your site.
By activating this plugin, you can now set up both SMS and email verification for your forms.
This ensures that every phone number and email address submitted is valid, significantly reducing spam and ensuring the data you collect is accurate.
With features like customized verification messages, pop-up customization, and automatic data storage, this plugin offers a comprehensive solution for securing your form submissions.
Next, we’ll configure the plugin to start verifying phone numbers with Twilio integration.
Step 3: Integrate Twilio Account with Contact Form 7
To set up SMS verification with the Contact Form 7 Verification plugin using the Twilio API, follow these steps to configure the necessary settings:
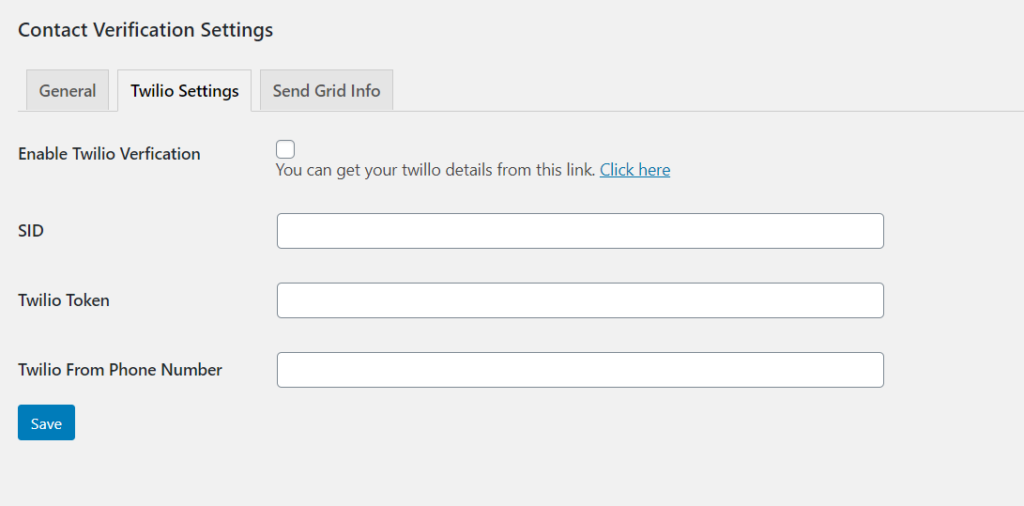
- Navigate to Twilio Settings: In your WordPress dashboard, find the settings page for the Contact Form 7 Verification plugin and click on the “Twilio Settings” tab.
- Enable Twilio Verification: Look for the option to enable Twilio verification and make sure it’s turned on. This activates the Twilio service for sending SMS verification codes.
- Enter Twilio Credentials: You will need to provide three key pieces of information from your Twilio account:
- Twilio SID: This is your account identifier in Twilio.
- Twilio Token: This is the authentication token you’ll use to access Twilio’s API securely.
- Twilio From Phone Number: This is the phone number from which the SMS will be sent. It must be a number you’ve verified or purchased from Twilio.
- Save Changes: After entering all the required details, click on the “Save” button to apply and save your settings.
By completing these steps, you’ve successfully configured your Contact Form 7 to use Twilio for sending OTPs via SMS, enhancing the security and reliability of your form submissions.
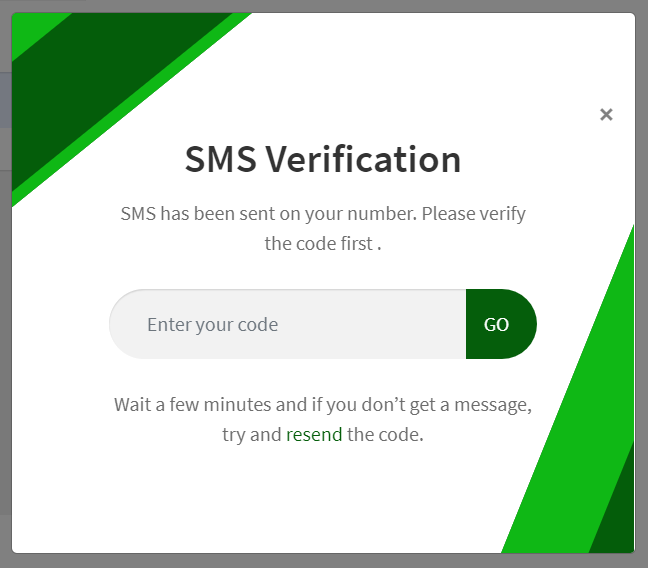
Now, whenever a user fills out the form and clicks the submit button, a verification code will be sent to the phone number they provided. A modal window for phone number verification will then appear. The user must enter this verification code to proceed further.
Follow this article if you want to know how to add email verification to Contact Forms 7.
Let us know in the comments if this was helpful!


![Contact Form 7 Formatting in WordPress [How to Do it The Right Way] Contact Form 7 Formatting in WordPress [How to Do it The Right Way]](https://wpdesc.com/wp-content/uploads/2024/07/Contact-Form-7-Formatting-in-WordPress-1024x512.png)
![How to Redirect Contact Form 7 to Thank You Page [2 Easy Ways] How to Redirect Contact Form 7 to Thank You Page [2 Easy Ways]](https://wpdesc.com/wp-content/uploads/2024/07/how-to-redirect-contact-form-7-to-thank-you-page-1024x512.png)
![How to Add reCAPTCHA to Contact Form 7 [2 Easy Steps] How to Add reCAPTCHA to Contact Form 7 [2 Easy Steps]](https://wpdesc.com/wp-content/uploads/2024/07/how-to-add-recaptcha-to-contact-form-7-1024x512.png)

Leave a Reply