Do you want to add Google fonts to WordPress? If so, you have landed on the right page.
Visually appealing text plays a crucial role in a website’s aesthetics. Even high-quality content can lose its impact if it’s not visually appealing and easily readable.
That’s where Google Fonts can come in handy. It’s one of the easiest ways to access hundreds of free, professional fonts.
In this guide, we will show you how to add Google fonts to WordPress in two simple ways.
Google Fonts: What Are They and Why Should You Use Them in WordPress?
Before we add Google Fonts to WordPress, let’s discuss what Google Fonts are and some of the benefits of using Google Fonts on your WordPress site.
Google Fonts —Brief Introduction
Google Fonts is an extensive library of open-source fonts that was launched in 2010. It offers 1,600 font families in multiple languages and web-optimized fonts that are free to use. You can access these fonts through a provided API and explore them using an interactive web directory, allowing you to search for and test different fonts directly in your web browser.
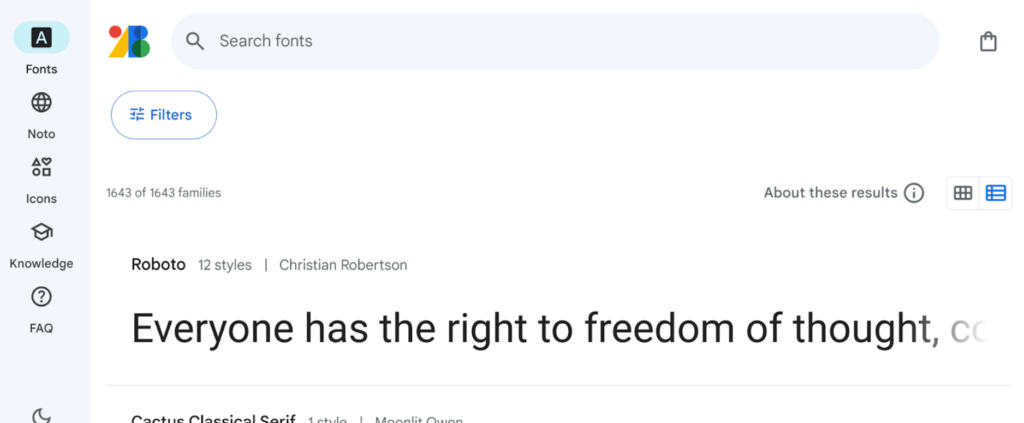
Why Use Google Fonts in WordPress?
Now that you know what Google Fonts are, let’s explore why incorporating these fonts into your WordPress site is a smart choice.
- Cost-Effective: Google Fonts are completely free, even for commercial projects. You can access a wide variety of professional fonts without spending a dime.
- Server-Friendly: Since Google hosts these fonts, they don’t consume your server’s resources. This can improve your website’s loading speed and overall performance.
- Multi-Purpose: You can download these fonts for use in both digital and print media, ensuring a cohesive look across various platforms.
- WordPress Theme Compatibility: Most modern WordPress themes support Google Fonts, making it easy to integrate them into your site without compatibility issues.
- Better User Experience: Using professional and aesthetically pleasing fonts can enhance your website’s readability and user experience, keeping visitors engaged.
- Easy Integration: Adding Google Fonts to your WordPress site is straightforward, allowing you to quickly revamp your site’s typography with minimal effort.
Keep in mind that fonts alone aren’t enough! An engaging theme is essential to maintaining user interest. WordPress provides some of the best themes to boost the overall user experience. So, to make your website more aesthetically appealing, you need to choose the right theme as well.
2 Easy Methods to Add Google Fonts to WordPress
To add Google fonts to WordPress manually, you have multiple options. Let’s explore each method so you can choose what works best for you.
Method #1: Add Google Fonts via WordPress Built-in Font Library
If you’re using a WordPress block theme with full site editing (FSE) functionality and have WordPress version 6.5 or higher, you can easily access the WordPress built-in font library. This feature allows you to import thousands of fonts from Google Fonts directly into your site.
To get started:
- Navigate to the full site editor by going to Appearance → Editor.
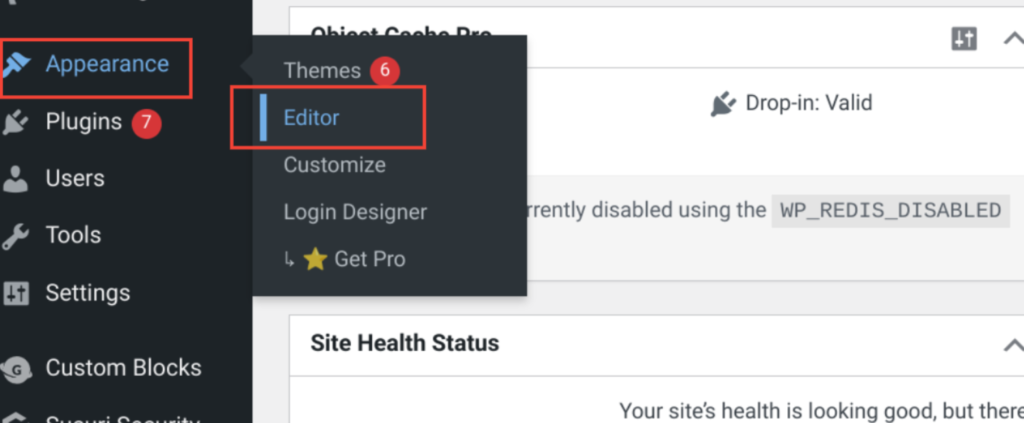
- Once in the editor, click on Styles, and then click on the pencil icon to edit styles. This action will take you to the FSE interface with the Styles option (represented by a split-circle icon) selected by default.
- From here, click on Typography.
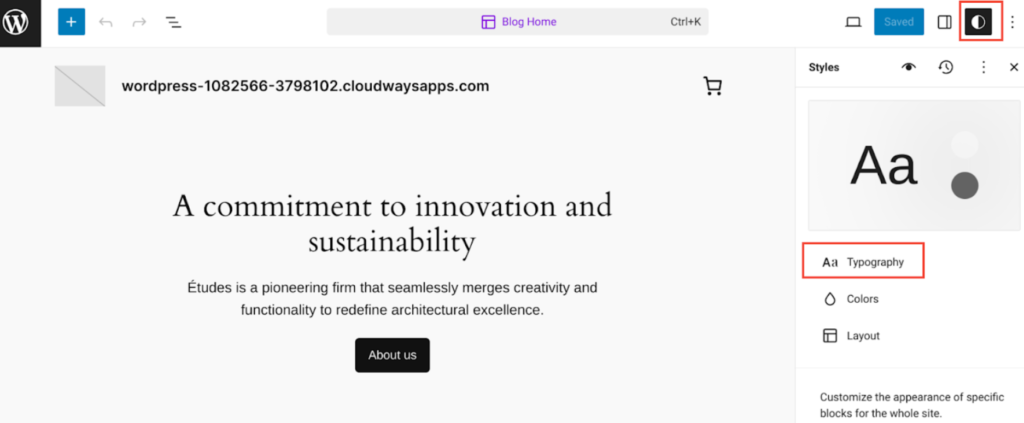
This step will display a list of available fonts.
- To access Google Fonts, click on the icon to the right of the subheading titled FONTS. This icon looks like two lines with a dot inside each line.
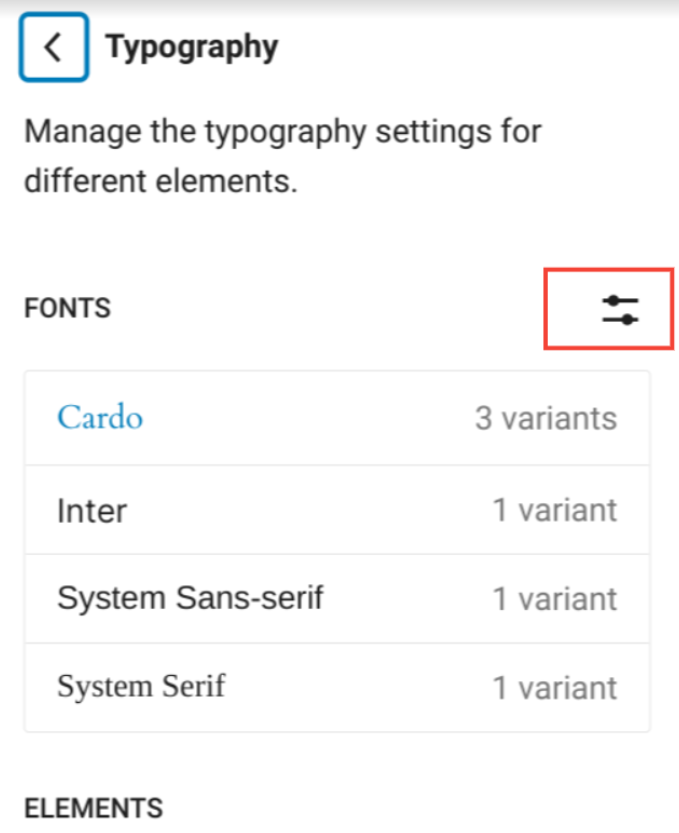
- Once you click it, the font library window will open. As shown below.
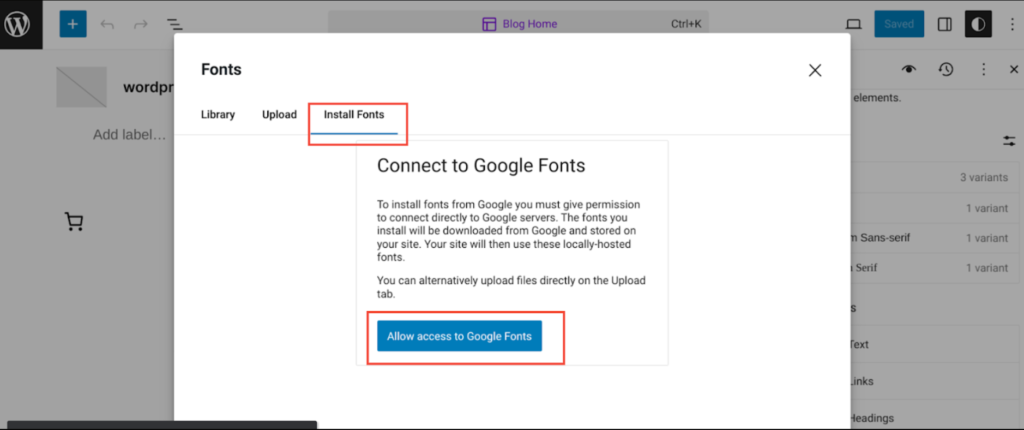
- In the font library window, select the third option: Install Fonts. Then, click Allow access to Google Fonts.
This simple process connects your site to Google Fonts, giving you access to more than 200 pages of font selections.
After connecting to Google Fonts, you can browse and choose the fonts you like. Once you’ve made your selections, you can apply these fonts globally across your entire site or locally to individual pages or posts.
Method #2: Add Google Fonts to WordPress by Embedding Code
If you’re not using a block theme or have a version of WordPress below 6.5, you can still use Google Fonts by embedding their code into your site. This method lets you import fonts from Google Fonts repositories without manually uploading font files to your website.
Google Fonts is one of the most popular repositories for free fonts. To use it, find a font you like on the Google Fonts website and click on Get Font.
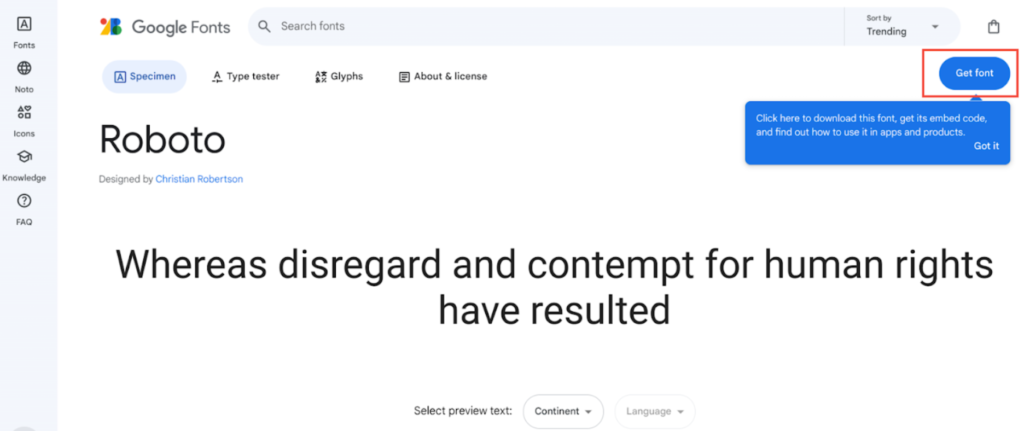
This action will open another screen where you need to click on Get embed code.
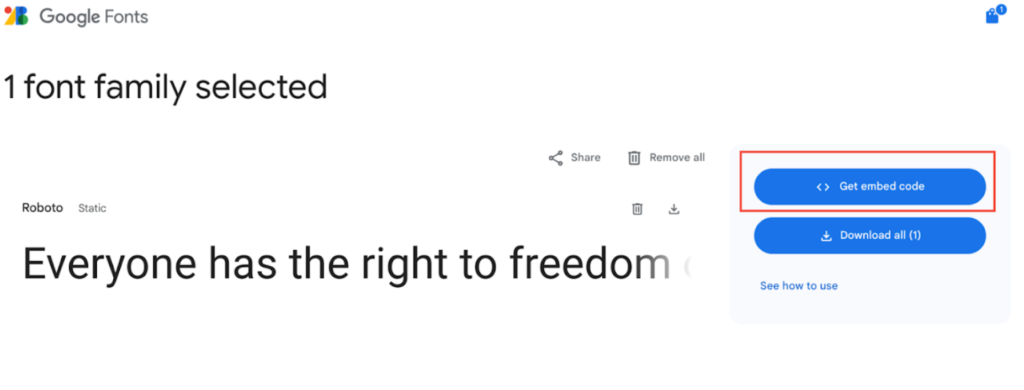
Next, go to Web → Link and then click on the ‘Copy code.’
This code will enable your website to fetch the font directly from Google.
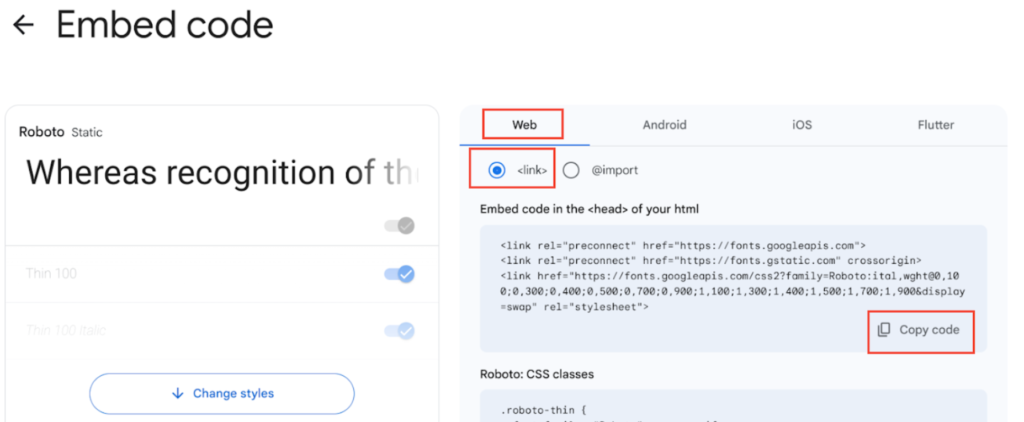
There are two main ways to add this embed code to your WordPress site:
- Edit the header.php file: If you’re comfortable editing your theme’s files, you can add the embed code directly into the <head></head> tags of your header.php file. This method ensures that the font loads on every page of your website.
- Use a plugin: If you prefer not to edit your theme’s files, you can use a plugin like “Head & Footer Code“. Install and activate the plugin, then navigate to its settings and paste the embed code into the HEAD Code section. This method is safer and easier for those unfamiliar with code editing.
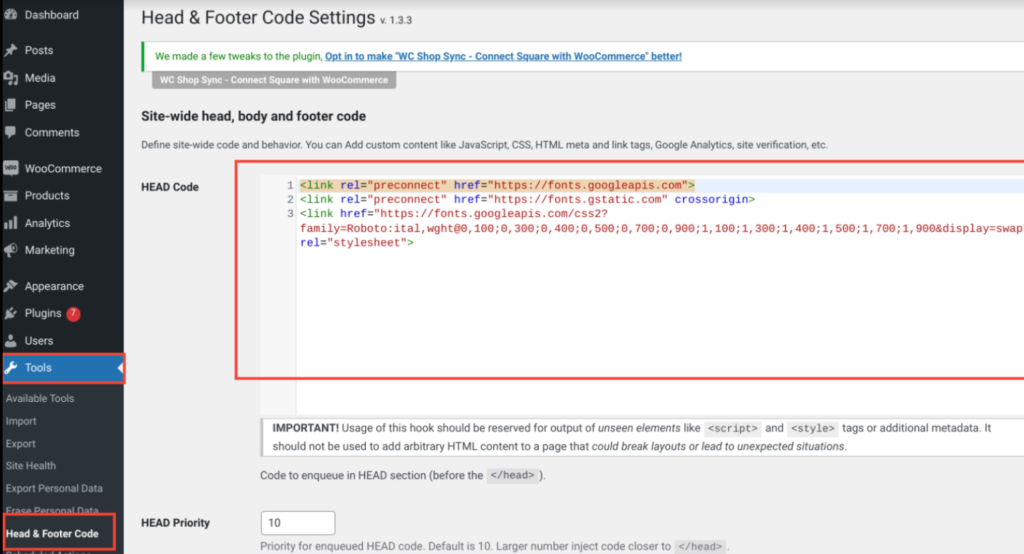
After adding the embed code, you need to assign the new font to specific elements on your website. The easiest way to do this is through the WordPress Customizer. Go to Appearance → Customize, then click on Additional CSS.
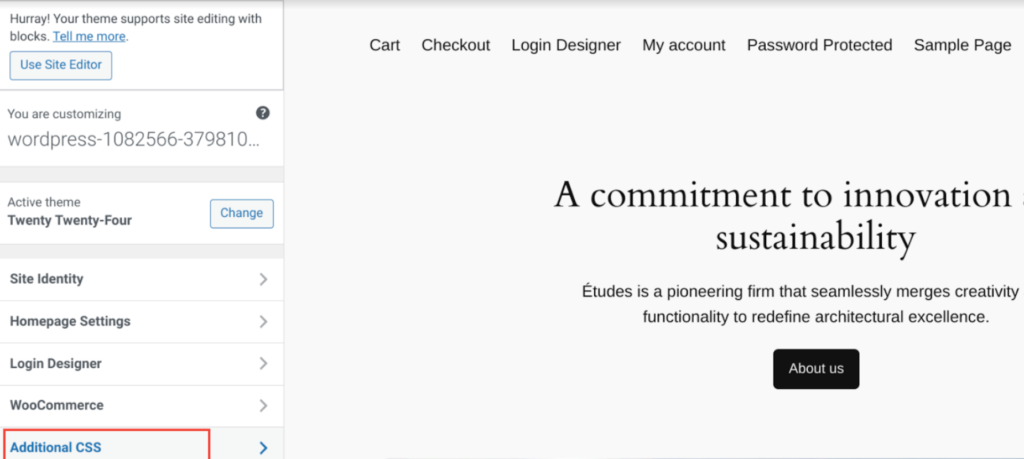
In the Additional CSS section, you can write custom CSS to apply the new font to different elements. For instance, to use your new font for main headings, you can add:
.h1, .site-title { font-family: “New Font”, sans-serif; }
Replace “New Font” with the name of the font you selected from Google Fonts. This CSS code tells WordPress to apply the new font to the specified elements.
NOTE: If you want to apply custom CSS to any specific Gutenberg block, check out our detailed guide about how to add Custom CSS to Gutenberg blocks.
5 Best Google Fonts to Use for Your WordPress Site
When it comes to selecting fonts from Google Fonts, the options are nearly limitless. As a webmaster, you have the freedom to choose the best fonts for your audience.
However, certain fonts are particularly popular for their readability. Over the years, Google Fonts has expanded its library extensively. Here are some of the most popular choices:
1. Open Sans
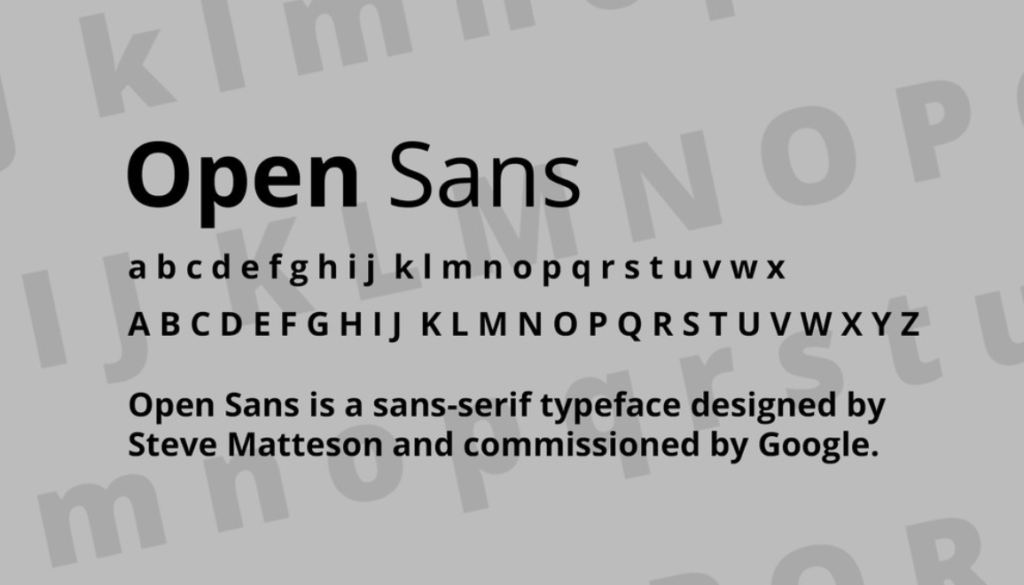
Open Sans is a widely used font in the design industry, created by Steve Matteson. This minimal, sans serif font is ideal for paragraphs and smaller text. It offers 13 styles, from light to extrabold.
2. Alegreya
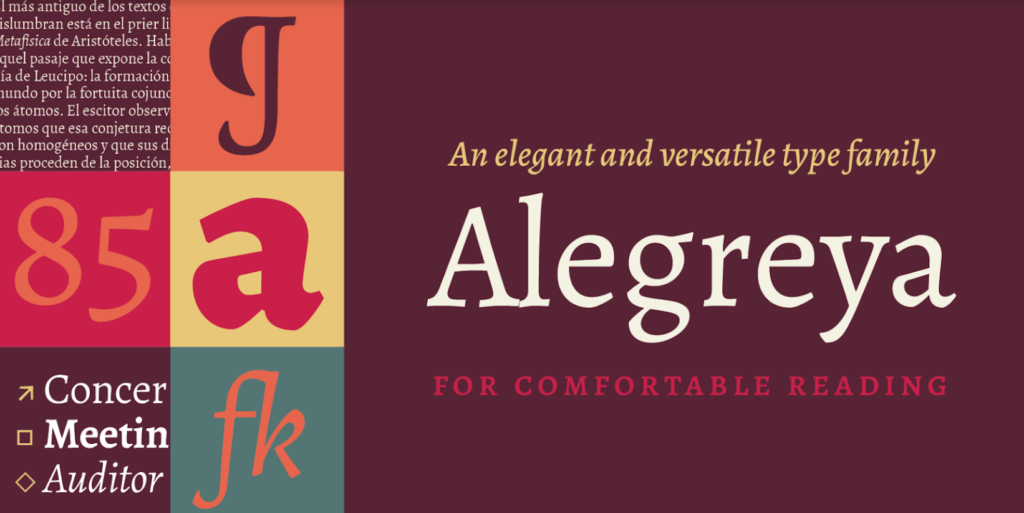
Designed by Juan Pablo del Peral, Alegreya is an elegant font with a classic, quill-like appearance. Initially intended for print, it translates well to digital screens, especially for sophisticated designs. Alegreya comes in 16 styles and weights.
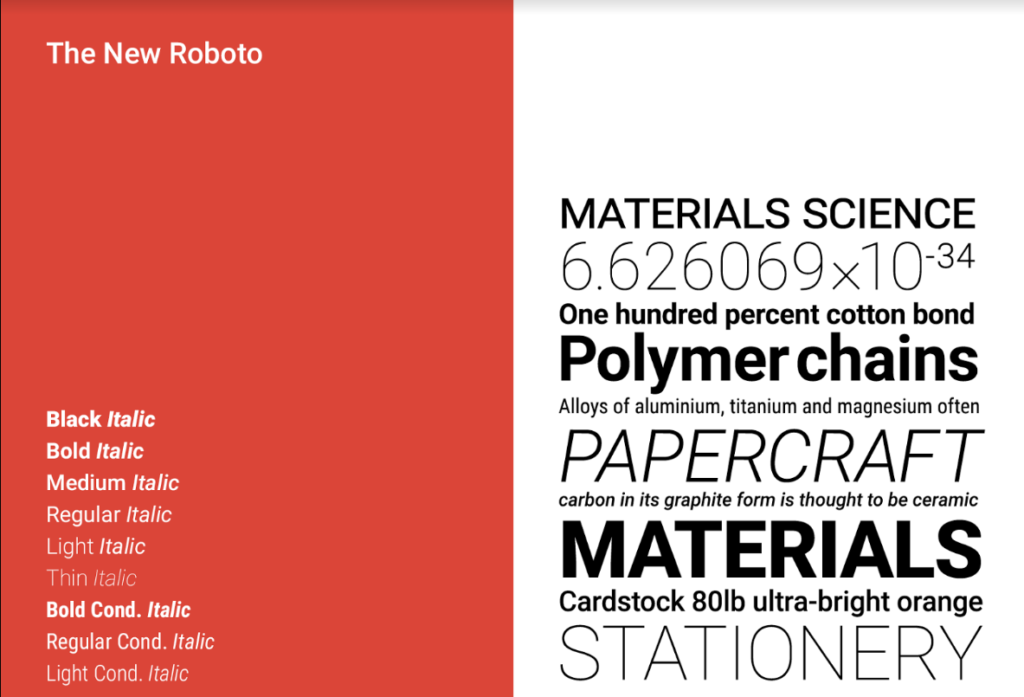
3. Roboto
Roboto, designed by Christian Robertson for Google, is a web-safe font used on Android devices and various Google services. Its clean and modern look makes it a favorite among designers. If you use a OnePlus device, you’re likely familiar with Roboto.
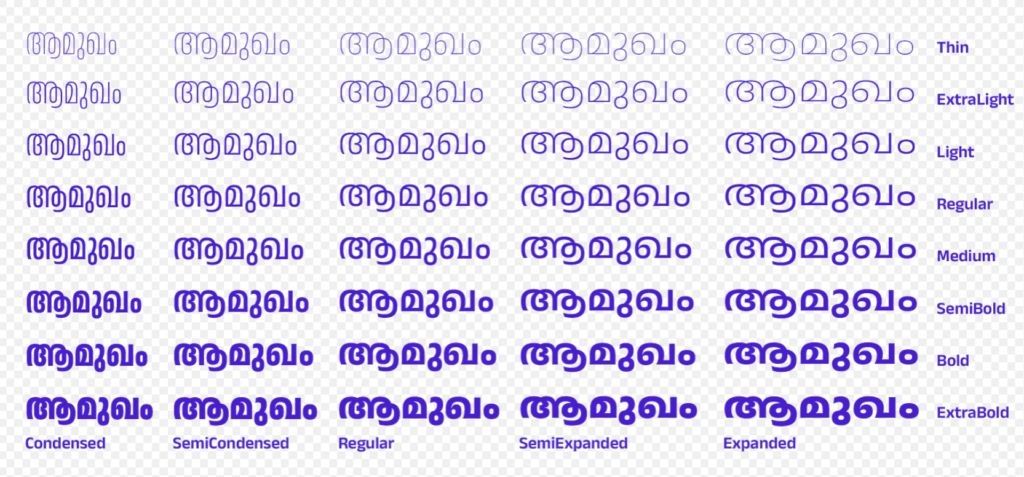
4. Anek
Anek is a sans serif typeface that supports Latin and nine Indian languages: Bangla, Devanagari, Kannada, Gujarati, Gurmukhi, Malayalam, Odia, Tamil, and Telugu. It offers different styles and weights for each language, making it a versatile choice for multilingual sites.
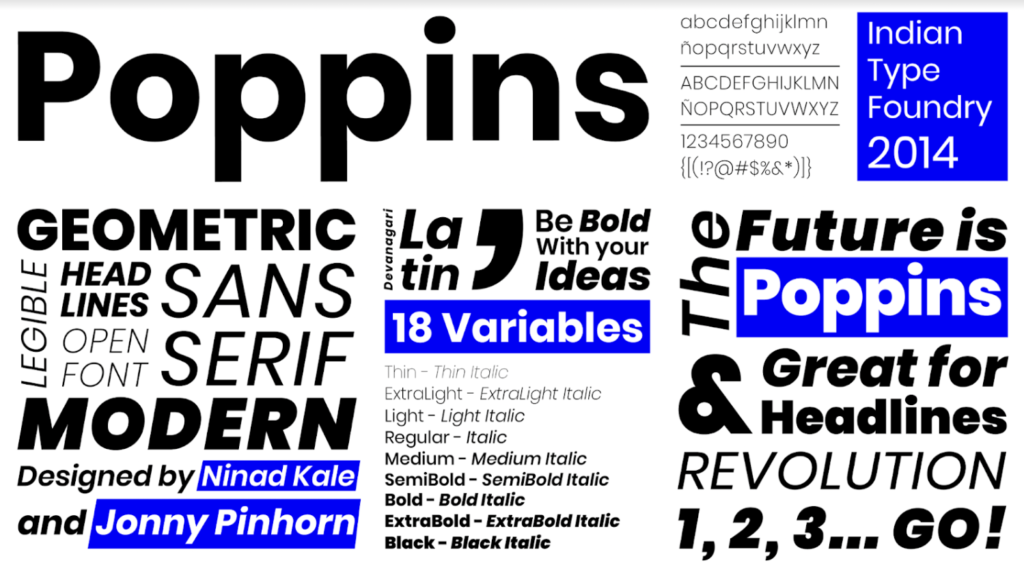
5. Poppins
Poppins is a newer font that quickly gained popularity among designers for its sleek, minimal aesthetic. It works well for bold headlines and titles, especially against contrasting backgrounds. Designed by Jonny Pinhorn and Ninad Kale, Poppins is available in 18 styles, from thin to black.
Best Practices to Use Google Fonts in WordPress
Integrating Google Fonts into WordPress isn’t complicated, but there’s always a difference between a good approach and the best practices.
Let’s check out the key recommendations for effectively utilizing Google Fonts:
- Optimize Font Weights: Avoid selecting all available font weights to prevent unnecessary API load and optimize site performance.
- Consider Local Hosting: While Google Fonts are reliable, hosting them locally can provide fallback options and potentially improve loading times.
- Enhance Accessibility: Customize font styles to ensure readability for users with visual impairments, prioritizing accessibility across all visitors.
- Choose Optimal Contrast: Select color contrasts that are legible on various screen sizes and types, maintaining readability without causing visual strain.
Implementing these practices ensures that Google Fonts not only enhance your website’s aesthetics but also contribute to an improved user experience on WordPress.
Final Remarks on Adding Google Fonts to WordPress
There is no doubt that adding Google Fonts to WordPress can easily change the look and feel of your website. Whether you want a professional-looking site or a fun one, the Google Fonts library has the perfect font for you.
We have shown you two easy methods to add Google Fonts to WordPress, which are:
- Add Google Fonts via WordPress Built-in Font Library
- Add Google Fonts to WordPress by Embedding Code
We hope you find it helpful.
Lastly, have you ever experimented with font libraries on your WordPress site? If so, then share your experiences with us in the comments below!

![How to Add Google Fonts to WordPress [2 Easy Methods] How to Add Google Fonts to WordPress](https://wpdesc.com/wp-content/uploads/2024/06/how-to-add-google-fonts-to-wordpress-1024x520.png)
![How to Fix Formidable Forms Not Sending Email [3 Easy Steps] How to Fix Formidable Forms Not Sending Email [3 Easy Steps]](https://wpdesc.com/wp-content/uploads/2024/08/how-to-fix-formidable-forms-not-sending-email-1024x512.png)
![How to Fix Divi Contact Form Not Sending Email in [3 Easy Steps] How to Fix Divi Contact Form Not Sending Email in [3 Easy Steps]](https://wpdesc.com/wp-content/uploads/2024/08/how-to-fix-divi-contact-form-not-sending-email-1024x512.png)


Leave a Reply