People always seeking ways to create a custom front-end user registration form because the default WordPress form shows WordPress branding and logo. It doesn’t match with the user’s website’s theme. In this article, we will help you how to create a custom registration form in wordpress.
Why do People add a Custom User Registration Form in WordPress?
As we all know that, the default wordpress user registration form shows wordpress branding and does not match the rest of the WordPress website. That’s why people need a custom registration form.
Creating a custom user registration form allows you to add a registration form to your website with a consistent user experience during the registration process. You can add a registration form on any page of your website.
Users can customize the form according to their requirements by adding additional user-profile fields, combine them with a custom front-end login form, and connect it with your email marketing service.
Let’s take a look at how to create a custom user registration form in wordpress.
Creating a Custom Registration Form
The first thing you have to do is install and activate the User Registration – Custom Registration Form, Login, And User Profile For WordPress plugin.
User Registration is the best wordpress plugin that provides you an easy way to create a frontend user registration form and login form. Drag and Drop fields make ordering and creating forms extremely easy.
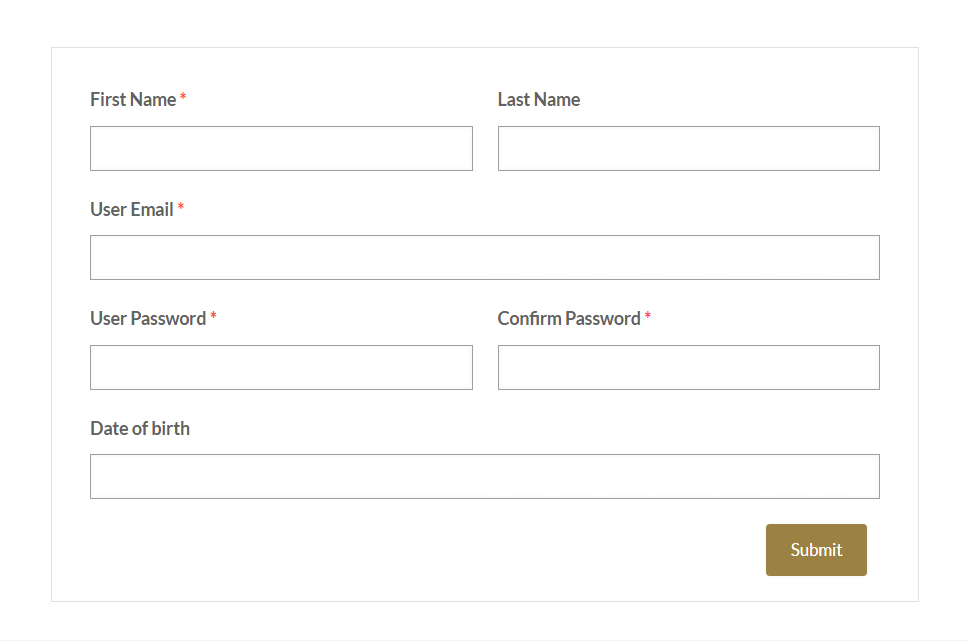
After activation you need to go User Registration >> Add New to launch the user registration builder. First, you need to enter a name for your form and click on the Create Form button. It will now create a simple registration form for you. This sample form will have the following WordPress registration fields added by default.
- User Email
- Password
You can drag and drop more fields from the left panel. You can also drag fields to rearrange their order.
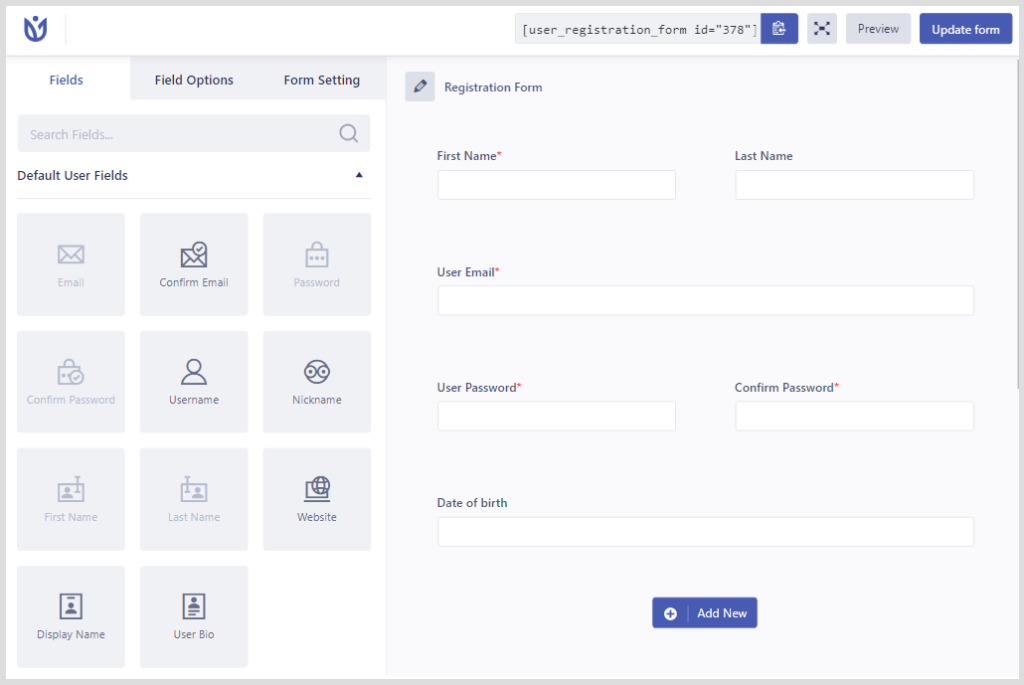
After that drag a field from the left panel to add it to your form. In this example, we are dragging the first name, last name, confirm password, and date of birth to our form.
You need to click on the field and form will show its options in the left panel.
User can change field label, add field placeholder, add description for the field. You can also hide and show field label.
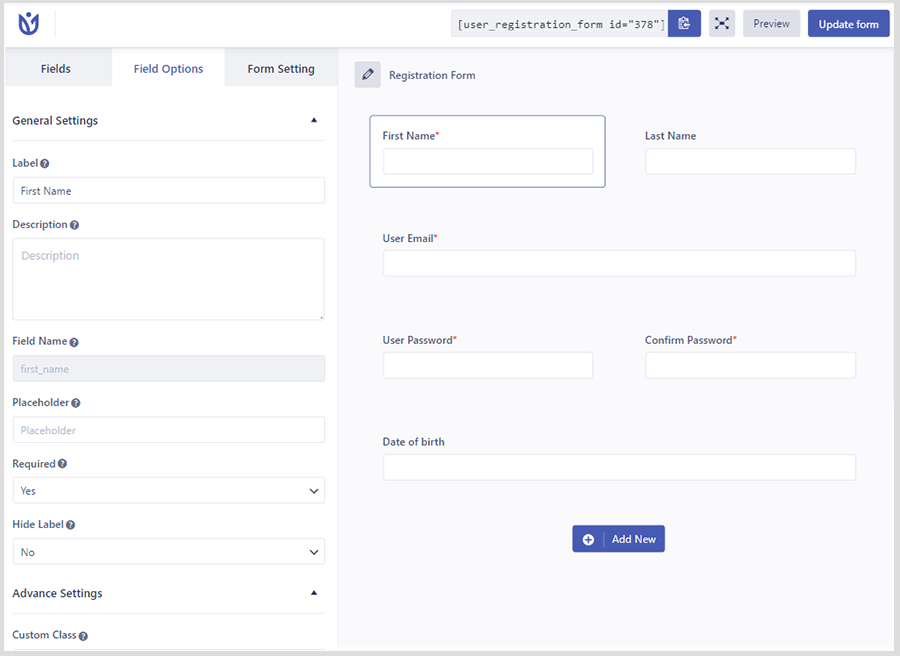
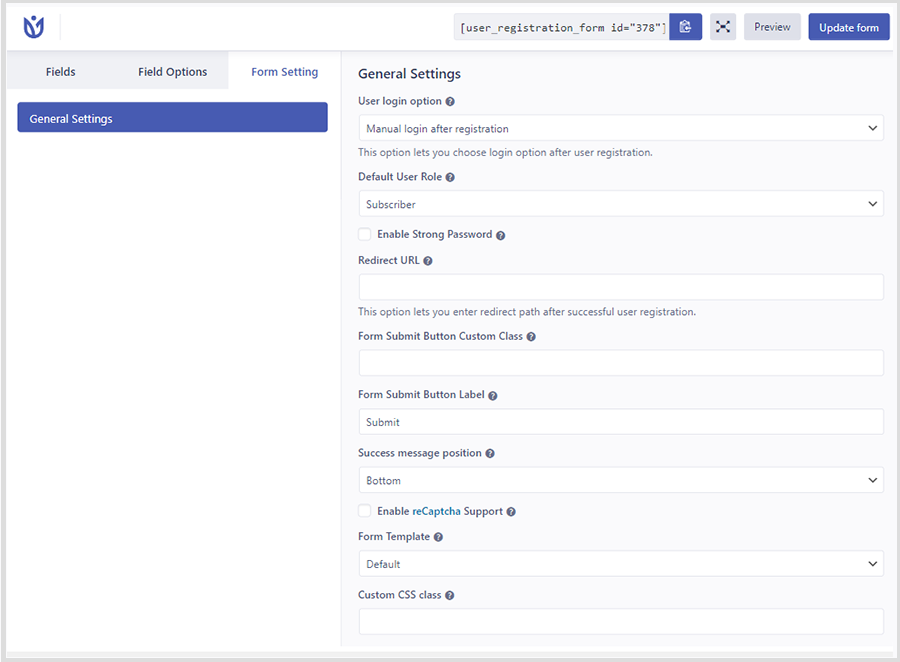
You will notice that the plugin will automatically map your default fields like Name, Email, Password, etc. Next, you need to click on Form Setting for advance settings. On form general settings
- You can choose login options after users registration
- You can select the default user role
- Allows you to enable strong password
- You enter the redirect path after a successful registration.
- User can add form Submit Button class and label
- Select success message position
- You can enable disable reCaptcha support
- Allows you to select a form template
- You can also add custom class in the form
Don’t forget to click on the Save button at the top right corner of the screen to save your form.
Adding Your Custom Registration form in WordPress
User Registration makes it easy to add forms into your WordPress posts, pages, and sidebar widgets.
All you need to do is create a new post/page or edit an existing one. On the post edit screen, you will notice the new Registration button.
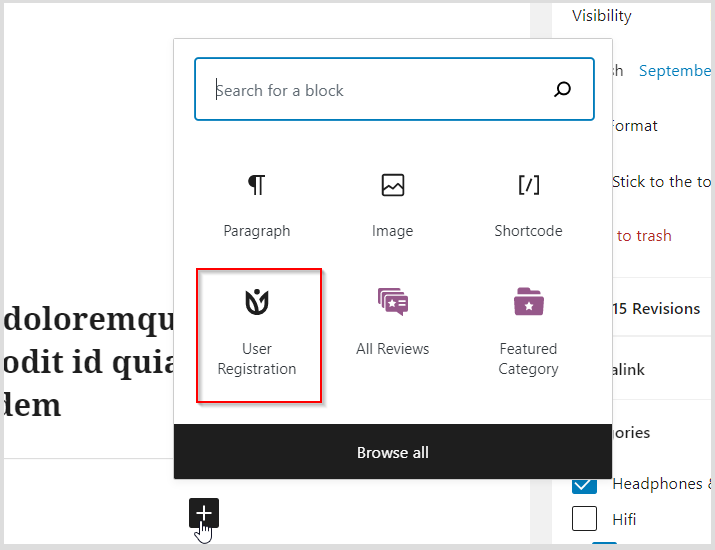
Clicking on it will show registration select box. All you need to do is select your form from the drop down menu.
You will notice the form preview will appear in your post’s content editor. Now you can publish or save your post/page and then preview your form.
We hope this article helps you How to create a custom user registration form in WordPress. If you liked this article, then please subscribe to our YouTube Channel for WordPress video tutorials. You can also find us on Twitter and Facebook.

![Contact Form 7 Formatting in WordPress [How to Do it The Right Way] Contact Form 7 Formatting in WordPress [How to Do it The Right Way]](https://wpdesc.com/wp-content/uploads/2024/07/Contact-Form-7-Formatting-in-WordPress-1024x512.png)
![How to Redirect Contact Form 7 to Thank You Page [2 Easy Ways] How to Redirect Contact Form 7 to Thank You Page [2 Easy Ways]](https://wpdesc.com/wp-content/uploads/2024/07/how-to-redirect-contact-form-7-to-thank-you-page-1024x512.png)
![How to Add reCAPTCHA to Contact Form 7 [2 Easy Steps] How to Add reCAPTCHA to Contact Form 7 [2 Easy Steps]](https://wpdesc.com/wp-content/uploads/2024/07/how-to-add-recaptcha-to-contact-form-7-1024x512.png)

Leave a Reply