This tutorial is about how to edit header in WordPress with full site editing.
With the block-based architecture of WordPress, you no longer need to edit the PHP template files to be able to customize your header.
Check out this WordPress Full Site Editing Tutorial for a complete walk through of the block based templating system of WordPress.
Your header in WordPress FSE is part of a pattern in WordPress that can be edited through the click-and-edit interface of Site Editor.
In this tutorial, we will walk you through the process of not just editing the header but also making the header responsive with full site editing.
So without further ado, let’s begin.
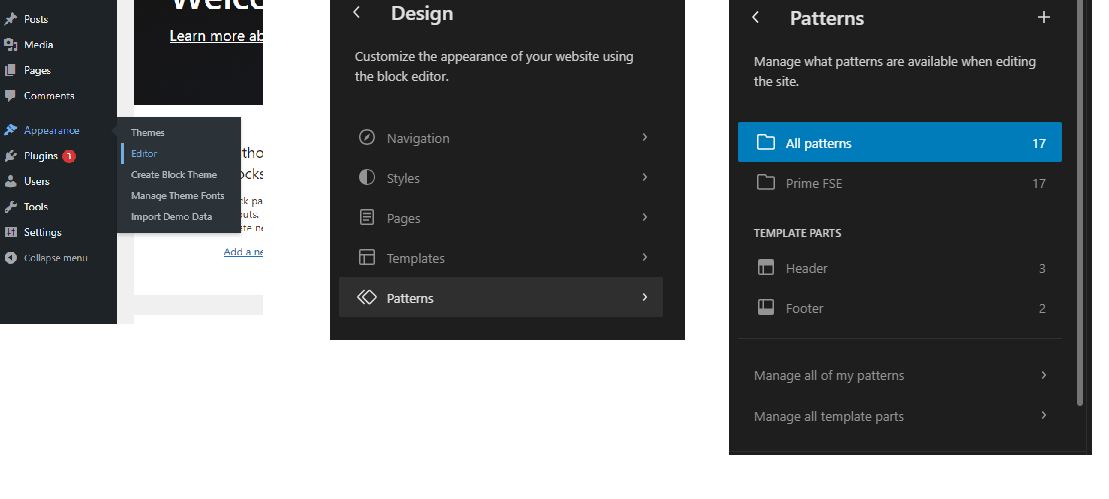
Navigate to Site Editor and then go to Patterns. Here you’ll see the template part named Header.
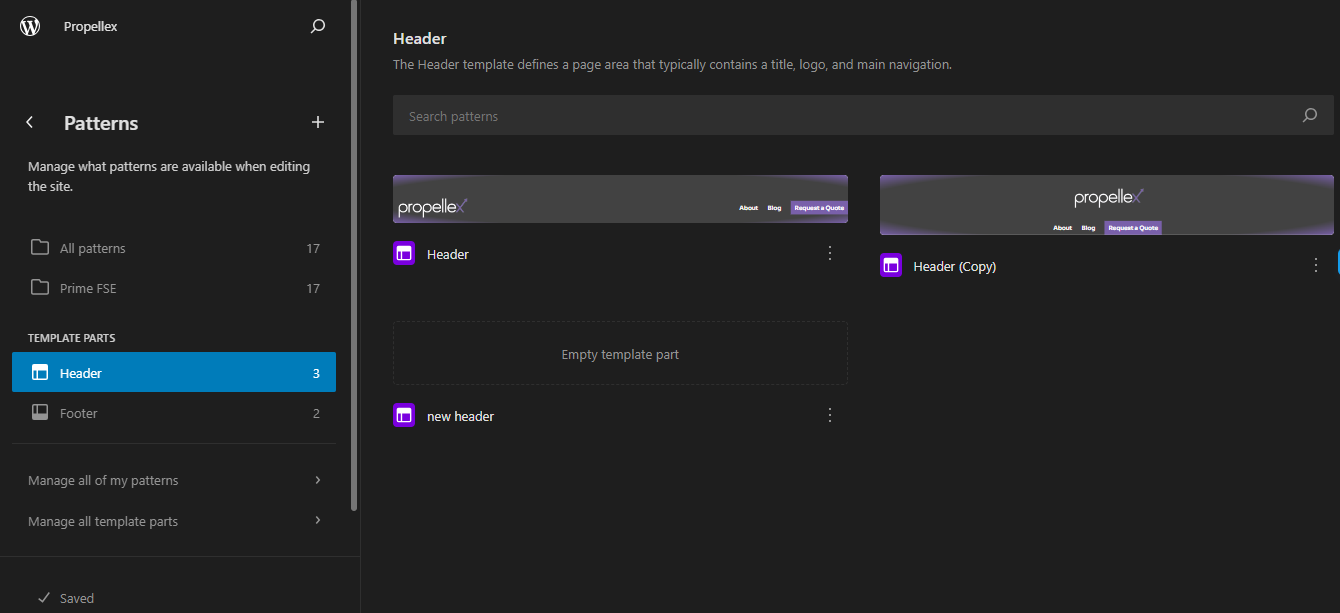
Click and select the style you want to edit.
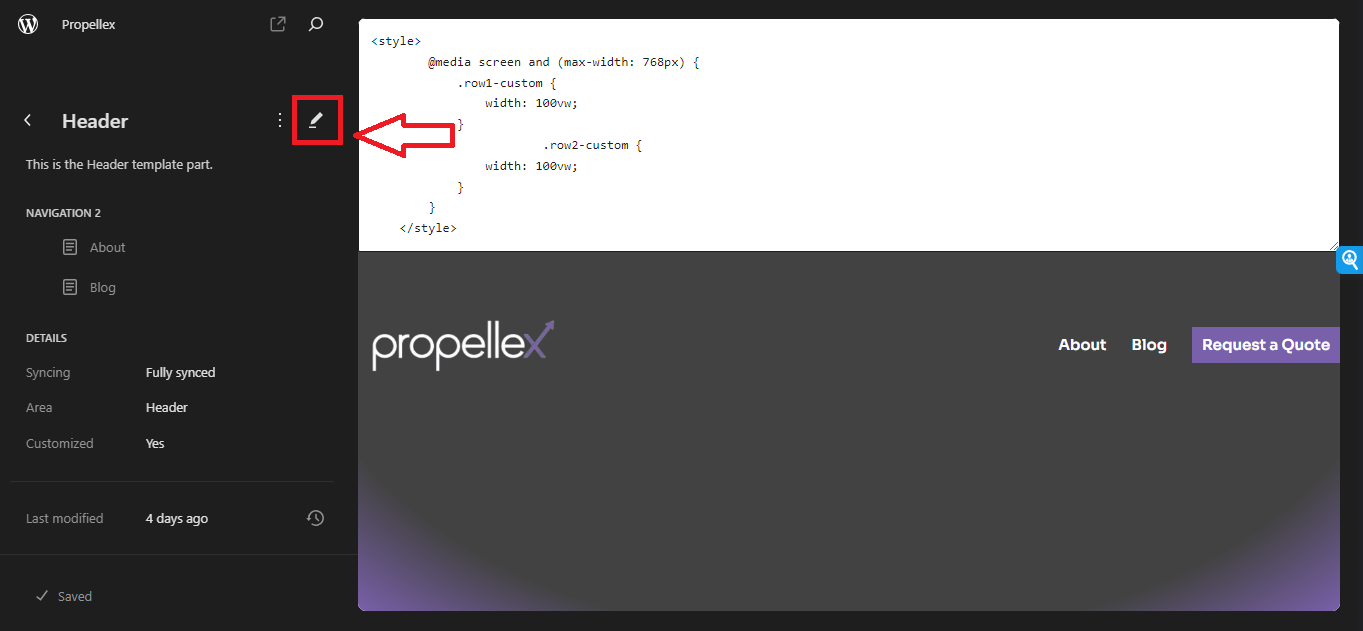
Click the pencil icon or anywhere on the canvas to be able to edit header in WordPress.
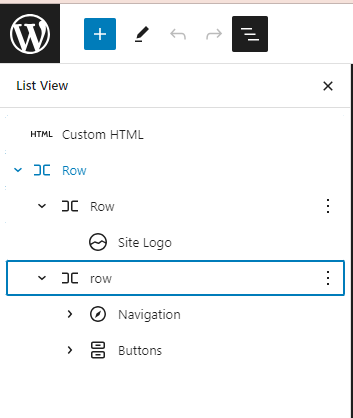
Utilize the list view when editing the header in WordPress full site editing. The list view is crucial in WordPress FSE. It helps you understand the structure and blocks used in your header, making editing more accessible and more organized.
If you’re feeling creative and want to create a custom header from scratch, you can do so easily with WordPress full site editing too.
Go to ‘Patterns’ in Site Editor and add a new template part by clicking the plus icon.
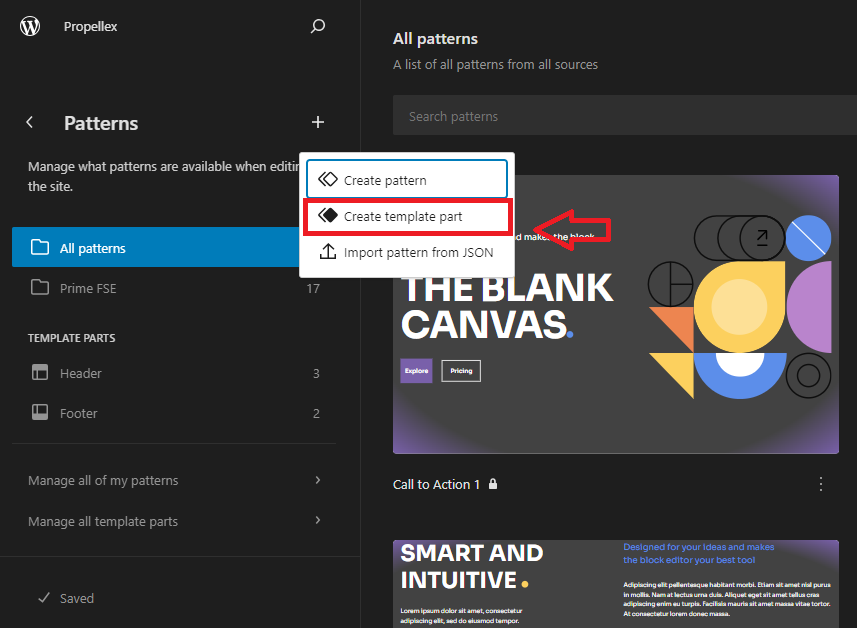
Select ‘Header’ from the options, give it a new name, and click Create.
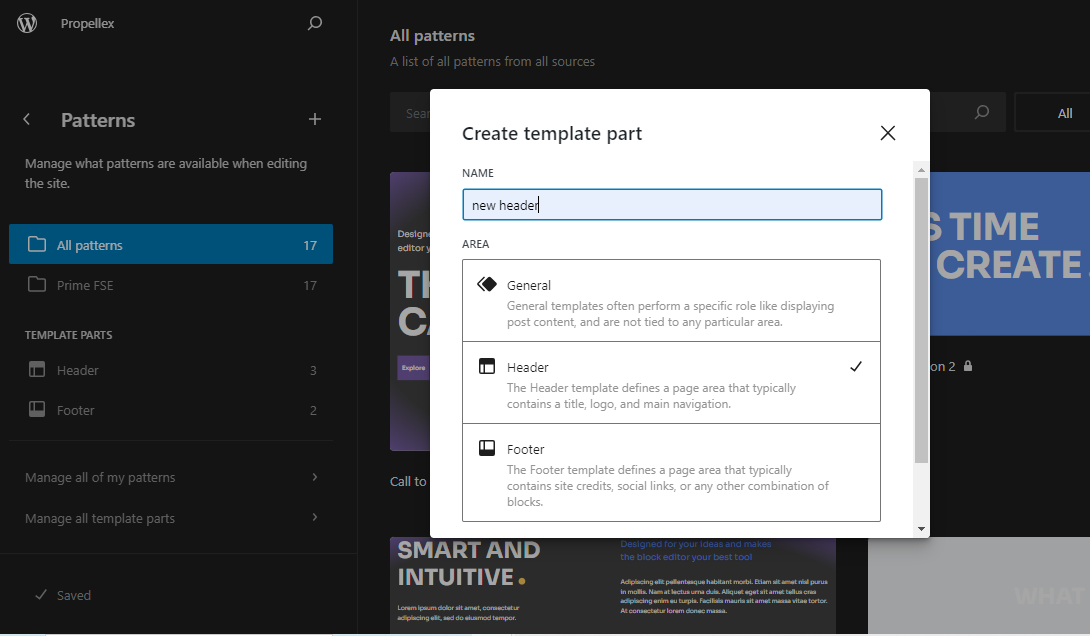
Now, you can see the click-and-edit interface of Site Editor where you can build and design your custom header from scratch.
Begin by adding a parent row and nest other rows in it to give a neat structure. Using rows will help you make the header responsive later on.

Place your site logo and consider how you want to structure navigation menus and buttons.
Customize the look and feel of your header. Adjust widths, alignment, and color schemes to match your brand. Utilize global styles for consistency or add specific styles to individual elements for a unique touch.
How to Design a Responsive Header in WordPress Full Site Editing
Unfortunately, one of the biggest limitations of WordPress full site editing right now is the complexity of designing responsive layouts. Unlike page builders like Elementor, Gutenberg doesn’t allow configuring separate settings for different screen sizes.
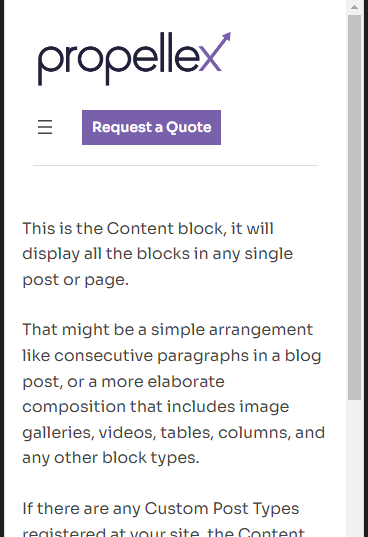
While the navigation menu collapses on mobile in a hamburger by theme-default, the header looks far from perfect on mobile, especially in my case when I had the button added in the header as well.
The below screenshot shows how my header looked before my customizations. Ideally, it should be center-aligned on mobile.
To be able to follow this tutorial on how to edit header in WordPress and make it responsive, you need to be comfortable with CSS and media queries.
Begin by inspecting the code and clicking the device icon to open the mobile view.
Play around with CSS styles to find out which styles you need to make the header look nice on mobile.
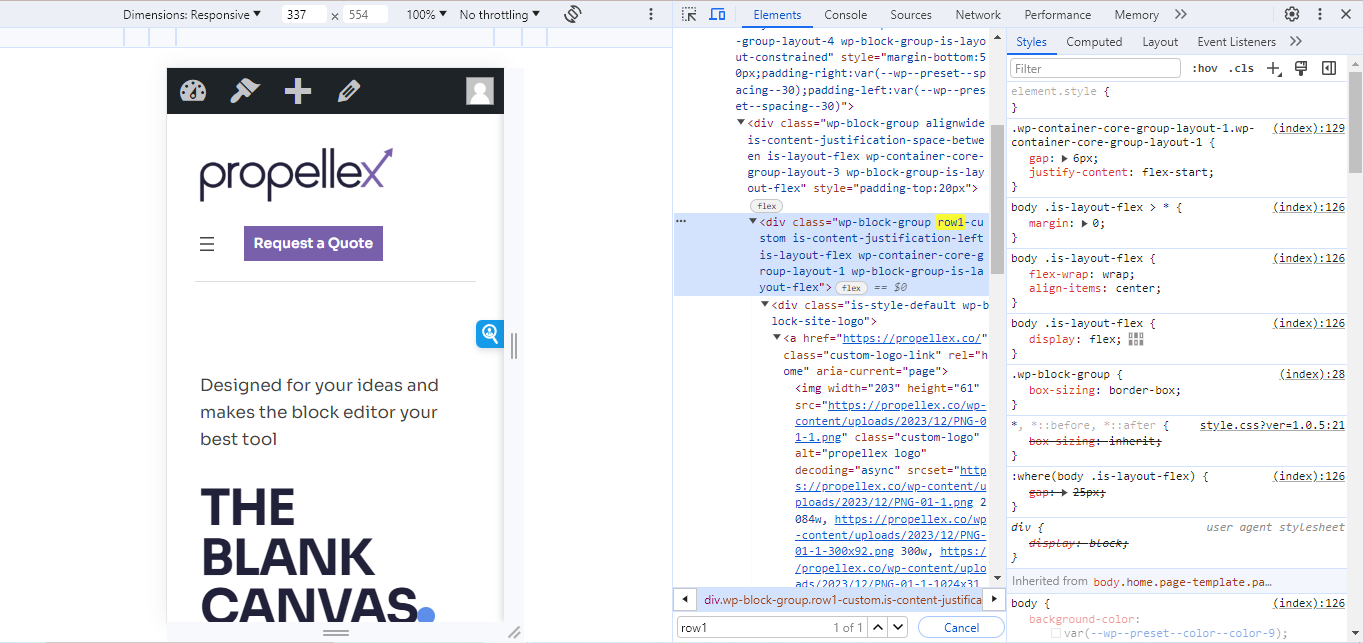
Once you know the CSS code you want to add, give custom classes to the blocks you want to style with CSS by selecting the block and adding custom classes under the Advanced tab.
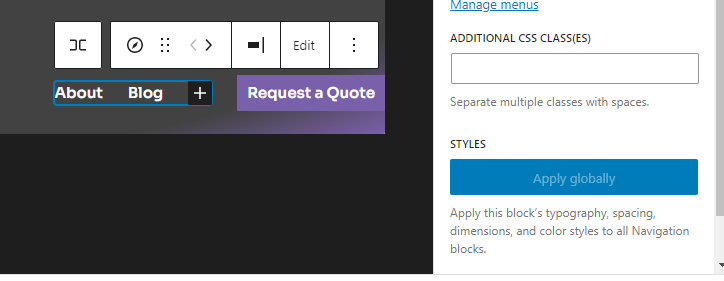
In the above scenario, the code that would do the trick was as follows:
@media screen and (max-width:768px){
  .row1-custom {
  width: 100vw;
}
  .row2-custom {
  width: 100vw;
}
}
With this code, both the rows, which nested the site logo and the nav menu plus button would take on the full width of the viewport on mobile. Both these rows were center justified but since they were configured to take on the width of their contents on desktop, the center justification had no effect. The CSS styles above changed the width setting of these rows on mobile. And so, when the rows took the full width of the viewport on mobile, the center justification now worked.
Now, the next challenge is where to add the CSS style and media queries. In the block-based system, adding CSS is no longer as simple as it used to be.
There are a couple of plugins that allow us to add CSS code but when I tried that, the code wasn’t working.
After playing around for a few hours trying every trick of the trade, I finally went into the theme files, thanks to the Create Block Theme plugin, and after careful inspection, found that the header template part was loading up the HTML file.
Here is a fail-proof method of adding custom CSS to the header template part that is almost guaranteed to work.
- Install and Activate the Create Block Theme plugin. This plugin lets you view and edit the theme files directly in WordPress. Unlike traditional themes, the FSE themes disable the option to view theme files from within the WordPress dashboard and you need this plugin, developed by WordPress.org to be able to do that.
- Navigate to Tools > Theme File Editor.
- In the theme files, look for the parts folder and select the header.html file to edit.
- Add the above code at the beginning of the file in a style tag.
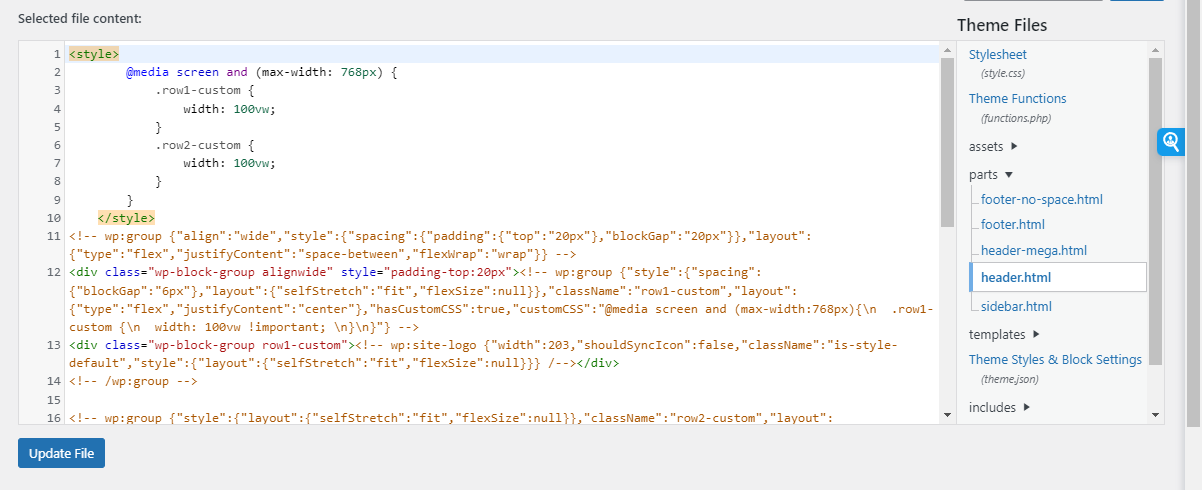
Save and reload the site to see if it worked.
Let us know in the comments if it did.
How to Replace the Header in WordPress Full Site Editing
So far we have looked at how to edit header in WordPress in Full Site Editing. Say, you created a new header from scratch. How do you then replace the default header with the new one and apply it across your website?
Replacing the Global Header
If you want to replace the global site header with the new custom header, follow the below steps:
- Navigate to Editor > Styles
- Click the header. You’ll see a message pop up that says Edit this Header. Click “Edit this Header” link.
- Now, click the header you want to replace, and then click the three vertical dots.
- In the menu that opens, click Replace Header.
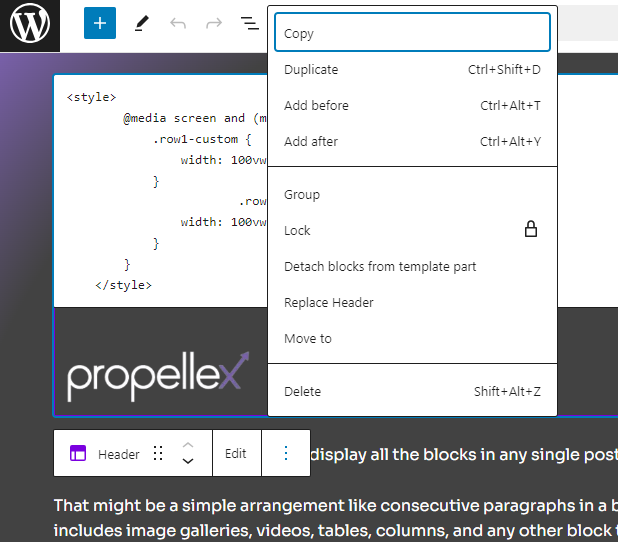
- Now, a modal window will open with all the different header template parts you can select. Choose the header template you want to replace the header with.
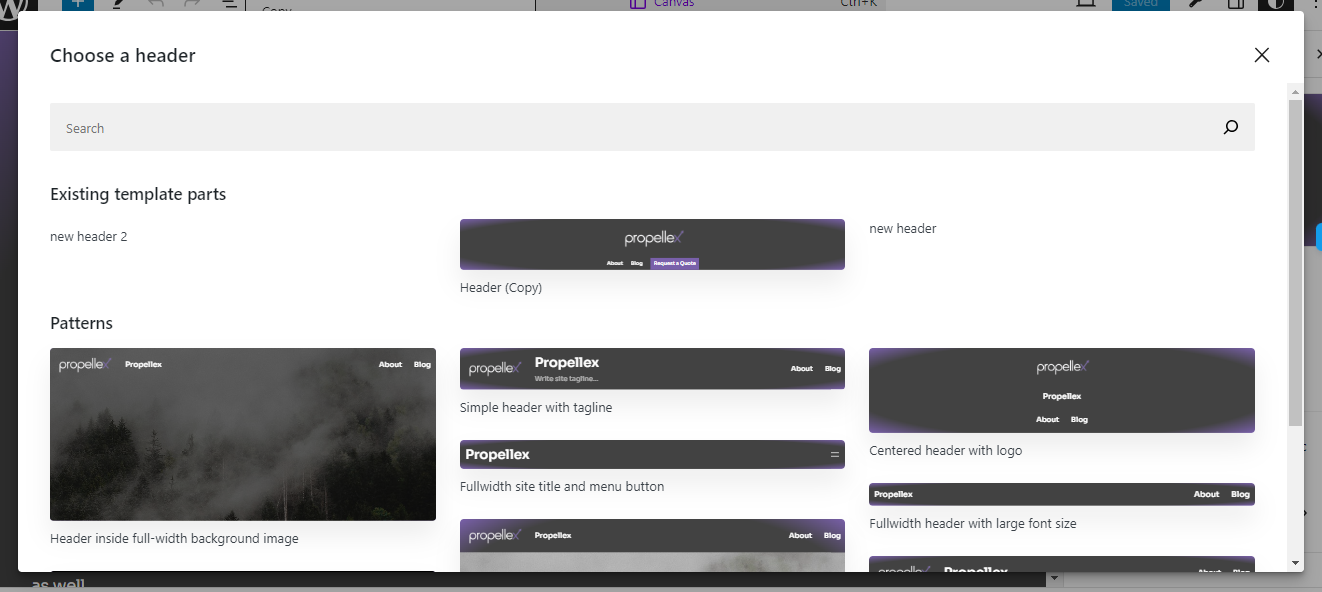
And that’s it. Your global header will be replaced with the new header.
Replacing the Header on a Specific Page
Let’s talk about another scenario in which you want to add a different header on a specific page. Say, you want to have a minimal header on a lead gen landing page so that the visitor doesn’t have too many options to stroll away.
How do you add a different header on a specific page in full-site editing?
The solution is to create a page template.
Navigate to Editor > Templates and click the plus icon to create a new template.
If you have already created a page that you want to apply the template to, select Page here. Otherwise, select Create Custom Template.
Give your custom template a name and click Create.
In the Site Editor interface, click the Plus icon and search for header. Select the header you want to insert from the options given.
Click save to save the new template.
When creating a new page, you can choose your page to use this template instead of the default page template.
And that’s it with editing headers in WordPress with Full Site Editing.

![Contact Form 7 Formatting in WordPress [How to Do it The Right Way] Contact Form 7 Formatting in WordPress [How to Do it The Right Way]](https://wpdesc.com/wp-content/uploads/2024/07/Contact-Form-7-Formatting-in-WordPress-1024x512.png)
![How to Redirect Contact Form 7 to Thank You Page [2 Easy Ways] How to Redirect Contact Form 7 to Thank You Page [2 Easy Ways]](https://wpdesc.com/wp-content/uploads/2024/07/how-to-redirect-contact-form-7-to-thank-you-page-1024x512.png)
![How to Add reCAPTCHA to Contact Form 7 [2 Easy Steps] How to Add reCAPTCHA to Contact Form 7 [2 Easy Steps]](https://wpdesc.com/wp-content/uploads/2024/07/how-to-add-recaptcha-to-contact-form-7-1024x512.png)
Leave a Reply