Do you want to reduce cart rejections and increase overall sales conversion? Shipping costs are one of the top reasons behind discarded cart sales. Most customers look for free shipping before checkout because everyone wants to save money. Many online store owners deal with this by offering free shipping to their customers. Through free shipping, they encourage their customers to spend a certain amount to get free shipping. Free shipping is a great way to increase cart orders and sales conversions.
In this article, we will show you how to add a free shipping bar in WooCommerce using the Free shipping bar for WooCommerce plugin.
Free Shipping Bar for WooCommerce
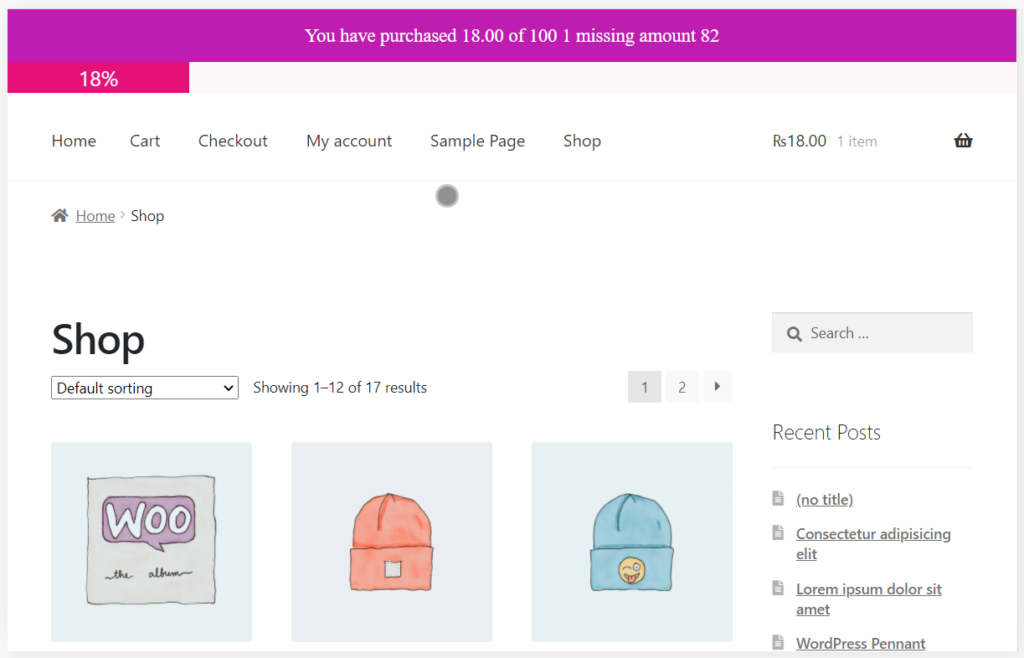
Free Shipping Bar for WooCommerce is the best WooCommerce plugin that increases order revenue using free shipping as a marketing tool. WooCommerce Free Shipping Bar plugin allows you to display how much a customer has purchased and how much they need to spend more to get free shipping. This plugin shows customizable success messages when customers purchase enough minimum amount of Free Shipping or amount missing to reach Free Shipping. Using the WooCommerce Free Shipping plugin, users can also display a customizable progress bar with the current percentage value on the front end.
Creating WooCommerce Free Shipping Bar
After installing and activating the WooCommerce Free Shipping Bar plugin, you need to Go to Dashboard >> WooCommerce >> Settings. Move to Shipping tab, you can add a new shipping zone with your country’s sell product: Add shipping zone >> Enter Zone Name >> Select regions within this zone >> Save changes.
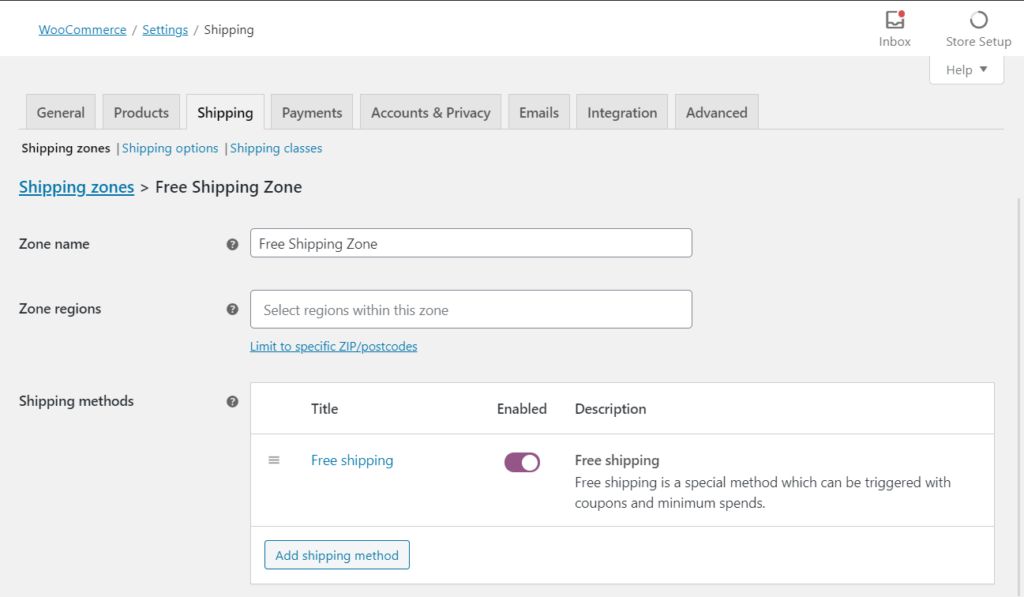
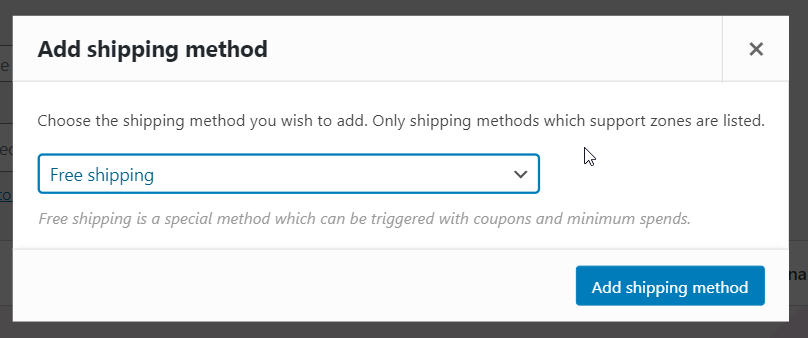
After that you need to Add a shipping method >> Choose Free Shipping >> Add shipping method. Click to Free Shipping >> setting a minimum order amount for this free shipping zone.
General Settings
Now go to Free Shipping Bar >> General tab >> Enable plugin functionality, select a Free shipping zone default. The Detect IP feature can be applied to detect in the country level, not working for states or provinces and regions within a country. Therefore, Shipping zones must be set at the country level.

Shipping Bar Design
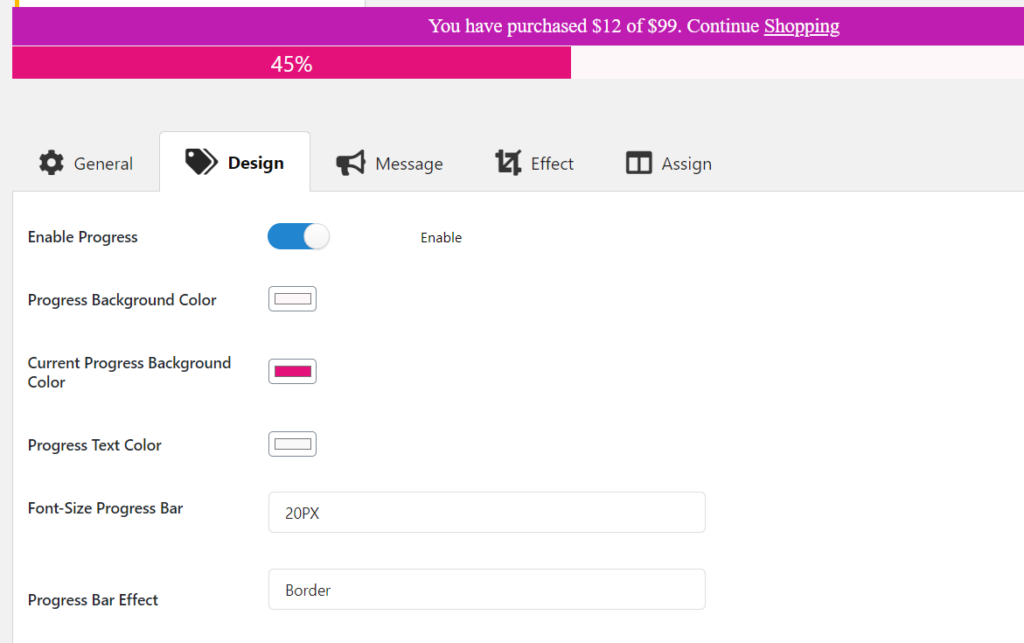
Now set the progress bar design according to your theme. The Shipping Bar plugin allows you to enable or disable the progressbar on the frontend. Users can customize the progress bar and content bar with 2 positions (top and bottom), Background Color, Text Color, Link Color, Font-Size, progress bar effect.
Customizable Messages
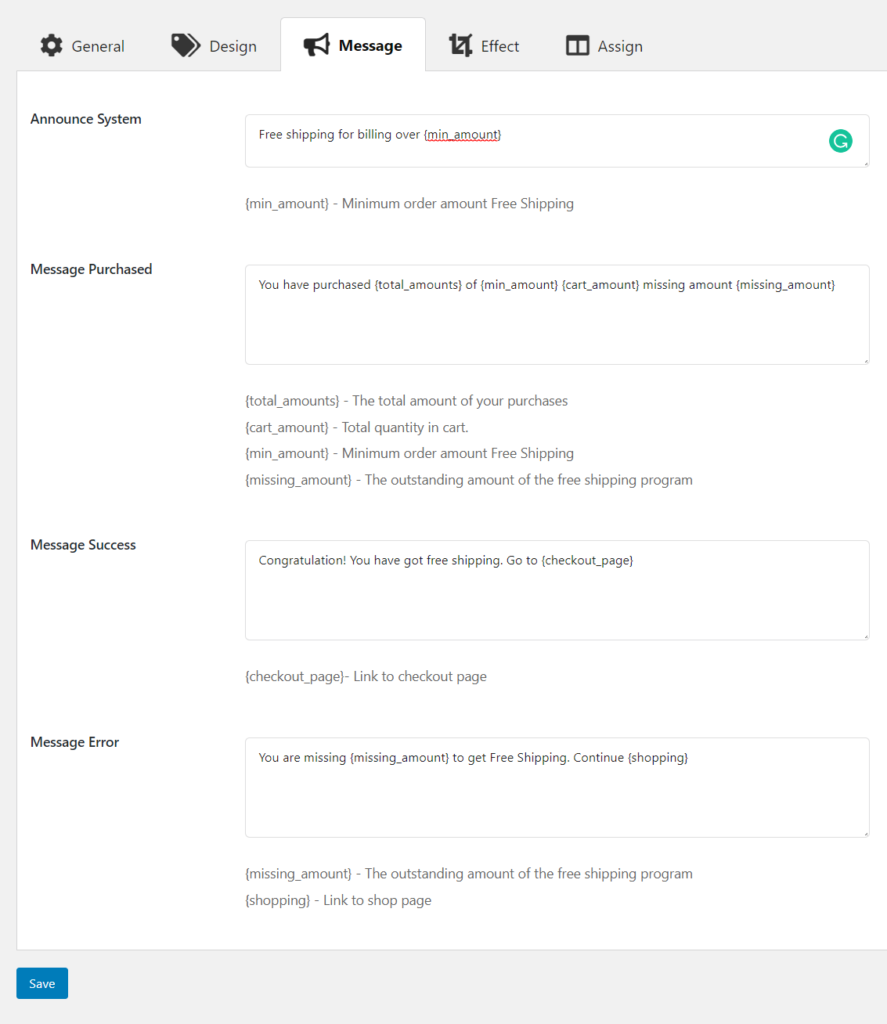
After that customize the text of Announce message, Purchased message, Success message, and error message.
Announce System: Content is shown in the main progress bar when users access the website. Use the available shortcode to add in this form
Message Purchased: Content notification is shown in the main progress bar when the user adds a product to the cart. Use some available shortcodes to add to this form.
Message Success: Content notification is shown in the main progressbar when the user’s total amount greater than or equal to a minimum order amount of the Free Shipping zone and then users can directly go to the checkout page with the available shortcode.
Message Error: Content is shown in the main progressbar of the checkout page when users missing amounts to received Free Shipping. This total missing can be added with the available shortcode.
Save all the changes and refresh your page and you will see a progress bar on your website.
We hope this article helps you to add a free shipping bar in WooCommerce. If you liked this article, then please subscribe to our YouTube Channel for WordPress video tutorials. You can also find us on Twitter and Facebook.

![Contact Form 7 Formatting in WordPress [How to Do it The Right Way] Contact Form 7 Formatting in WordPress [How to Do it The Right Way]](https://wpdesc.com/wp-content/uploads/2024/07/Contact-Form-7-Formatting-in-WordPress-1024x512.png)
![How to Redirect Contact Form 7 to Thank You Page [2 Easy Ways] How to Redirect Contact Form 7 to Thank You Page [2 Easy Ways]](https://wpdesc.com/wp-content/uploads/2024/07/how-to-redirect-contact-form-7-to-thank-you-page-1024x512.png)
![How to Add reCAPTCHA to Contact Form 7 [2 Easy Steps] How to Add reCAPTCHA to Contact Form 7 [2 Easy Steps]](https://wpdesc.com/wp-content/uploads/2024/07/how-to-add-recaptcha-to-contact-form-7-1024x512.png)
Leave a Reply